|
|
| Line 26: |
Line 26: |
| | ==How to Charge TeltoHeart== | | ==How to Charge TeltoHeart== |
| | {| class="tlt-border" style="width:100%;border: 1px solid #e8e8e8;" | | {| class="tlt-border" style="width:100%;border: 1px solid #e8e8e8;" |
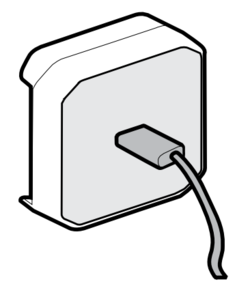
| − | |style="text-align: left; background: white;" | 1. Insert a USB Type-C cable into the charging dock.<hr> | + | |style="text-align: left; background: white;" | [[Image:Nr1.png|50px|link=]] Insert a USB Type-C cable into the charging dock.<hr> |
| | |style="text-align: left; background: white;" |[[image:Chargingdock_insert1.png|250px|link=]] | | |style="text-align: left; background: white;" |[[image:Chargingdock_insert1.png|250px|link=]] |
| | |- | | |- |
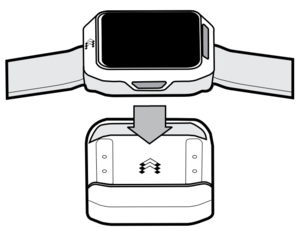
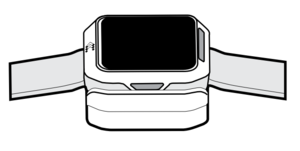
| − | |style="text-align: left; background: white;" |2. To recharge, place TeltoHeart on the charging dock, which is included in the packaging.<hr> | + | |style="text-align: left; background: white;" |[[Image:Nr2.png|50px|link=]] To recharge, place TeltoHeart on the charging dock, which is included in the packaging.<hr> |
| | |style="text-align: left; background: white;" |[[Image:Chargingdock_connected1.png|300px|link=]] | | |style="text-align: left; background: white;" |[[Image:Chargingdock_connected1.png|300px|link=]] |
| | [[Image:Chargingdock_insert2.png|300px|link=]] | | [[Image:Chargingdock_insert2.png|300px|link=]] |
Revision as of 11:51, 19 February 2024
Main Page > TeltoHeart > TeltoHeart First Start
Contents of the box
|
|
|
|
| Charging dock used to charge TeltoHeart
|
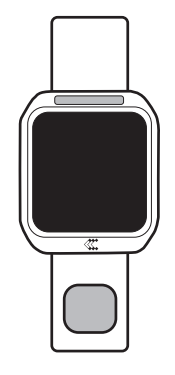
TeltoHeart with strap attached
|
Instructions with easy-to-understand illustrations.
|
- TeltoHeart is supplied with charging dock which is powered via USB connector with 5 Vdc, USB Type-C.
How to wear TeltoHeart
|
|
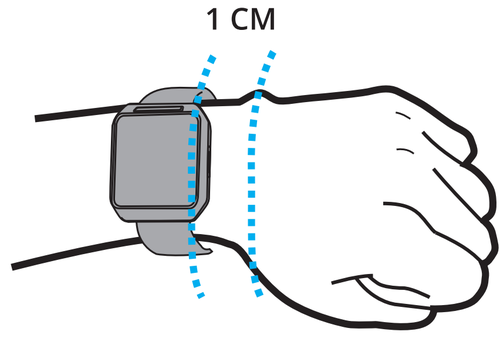
| Secure TeltoHeart around your left hand lower arm, 1 cm above your wrist bone, as illustrated. Avoid fastening it too tightly or too loosely.
|
How to Charge TeltoHeart
Overview
Start using TeltoHeart
| How to Use TeltoHeart
|
| 1. To activate TeltoHeart, press and hold the button for not less than 10 seconds until the device screen powers on.
|
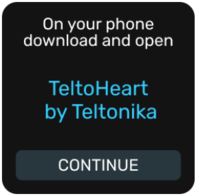
| 2. When TeltoHeart is turned on for the first time, it will prompt to download TeltoHeart application.
|
|
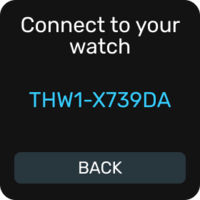
| 3. You will be able to locate TeltoHeart on the TeltoHeart application as its name will be displayed on the TeltoHeart screen.
|
|
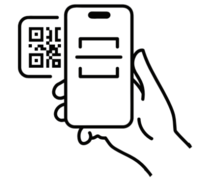
| 4. Visit Teltoheart to download the TeltoHeart application or scan the QR code below. Alternatively, you can explore the iOS app store or Google Play store and search for the TeltoHeart application made by Teltonika Telemedic.
|

|
Please note:
Please be aware that if your mobile operating system is older than the version described in the guide, the app may not be visible.
|
|
|
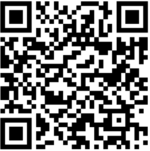
Scan the QR code to download the TeltoHeart application
from the Apple Store
|
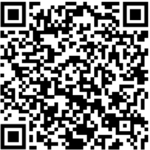
Scan the QR code to download the TeltoHeart application
from Google Play Store
|
5. After installing the app, tap  icon to open the app. icon to open the app.
|
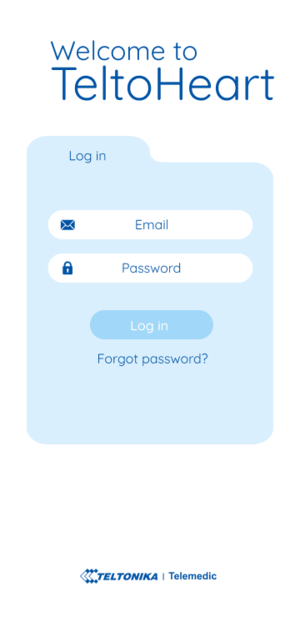
| If it is your first time using the app, sign-in by entering your email address and the password, which has been sent to your email. Tap Log in to proceed.
|
|
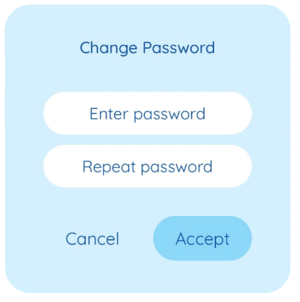
| 6. TeltoHeart application will prompt you to change the default password to a personal preferred password of your choice.
|
|
| 7. Once you have successfully changed your password, the next step is to review and accept the Terms and Conditions. You will be prompted to acknowledge and agree to the Terms and Conditions before proceeding.
|
| 8. Once signed-in, the TeltoHeart application will ask for Bluetooth permissions. Tap Allow to let the application use Bluetooth connection.
|
How to Pair TeltoHeart with TeltoHeart mobile application
|
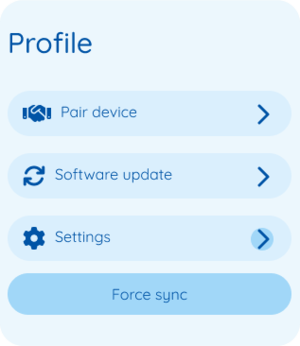
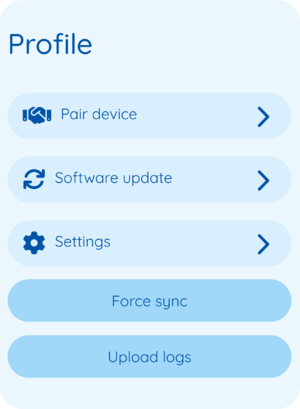
| 1. Tap Pair device to proceed with the pairing process.
|
|
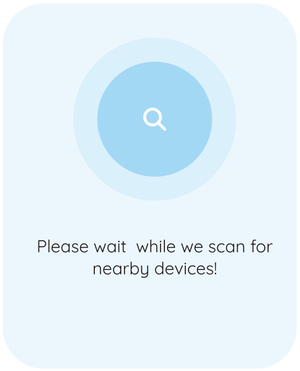
| 2. TeltoHeart application will initiate a search for nearby devices.
|
|
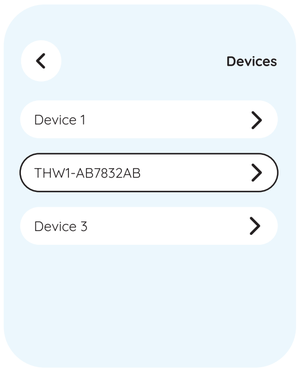
| 3. Select your smart wearable by tapping on it.
|
|
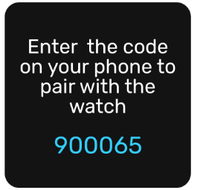
| 4. TeltoHeart will notify you of an incoming pair request.
|
|
| 5. When prompted to do so, enter the passkey shown on your TeltoHeart into the Bluetooth pairing request window in the TeltoHeart application.
|
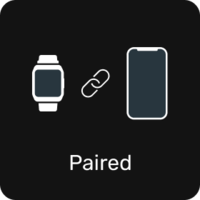
| 6. TeltoHeart will notify you about a successful pair with the TeltoHeart application.
|
|
| 7. Make sure TeltoHeart application is always running in the background, otherwise the data transfer will not be available.
|

|
Please note:
To ensure uninterrupted data transfer from your watch to the platform, it is important to keep the TeltoHeart application running in the background at all times. If you close the app, data transfer to the TeltoCare platform will not be available.
|
|
Recording an ECG
| Recording an ECG
|
Before you start
- To measure and record physiological parameters, TeltoHeart utilizes photoplethysmography (PPG) and electrocardiogram (ECG).
- To transmit ECG data, ensure that TeltoHeart and TeltoHeart mobile application are paired with iOS 14 or later / Android 10 or later.
- To activate the ECG function, simply open the ECG function in TeltoHeart.
|
Setup
- Push the side button once to open up a menu.
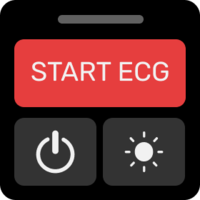
- Tap the ECG function icon
 on your TeltoHeart. on your TeltoHeart.
- Follow instructions on screen.
|
| How to take ECG recording
1. Follow the instructions on screen and tap NEXT.
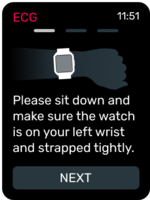
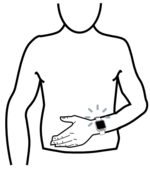
2. Please sit down and make sure TeltoHeart is on your left wrist and strapped tightly but comfortably.
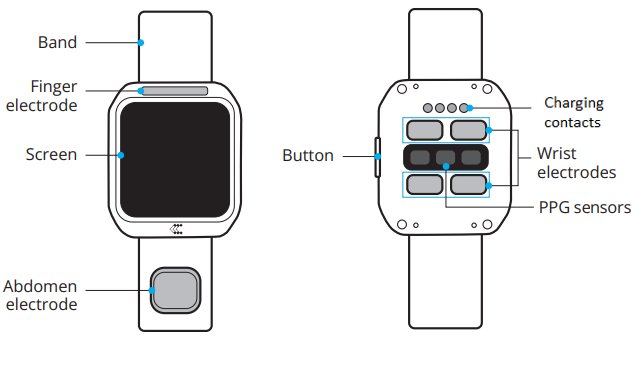
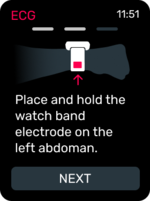
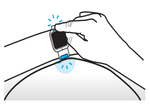
3. Place and hold the abdomen electrode on the left abdomen side in the level of the belly button.
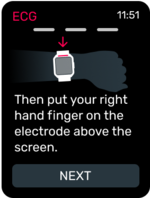
4. While holding the abdomen electrode on the left abdomen side in the level of the belly button, put your right hand finger on the finger electrode above the screen.
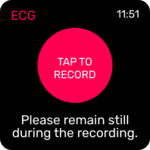
5. Select Tap to Record and during the countdown, perform the actions described above. Do not forget to keep your right hand finger on the finger electrode and remain still during recording.
6. The recording lasts for 60 seconds.
7. Once the recording is finished, you will see the message Recording completed displayed on the TeltoHeart screen.
|

|
Please note:
- Please keep the TeltoHeart application running in the background to allow measurement data transfer.
- ECG recordings cannot be performed if battery charge is less than 10%.
|
|
How to view data in TeltoCare
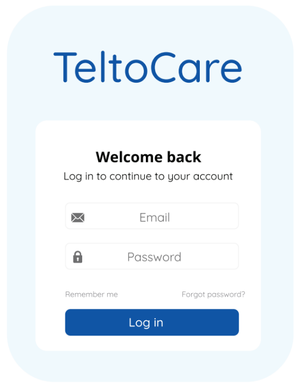
| 1. Open a web browser and go to the URL TeltoCare
2. Enter your login details in the login field.

|
Please note:
TeltoHeart mobile application and TeltoCare share the same login details.
|
|
3. Click the Log in button to access your TeltoCare account.
4. Once logged in, you will be directed to the Patient Dashboard, where you can view various patient-related information.
5. Look for the Electrocardiogram section.
6. Review the ECG recordings displayed in the Patient Dashboard to access the relevant data related to the patient's electrocardiogram.
7. If you do not see your ECG measurement data reflected in the TeltoCare platform yet, you have the option to perform a Force sync connection within the TeltoHeart application. This feature allows you to manually initiate a data transfer and ensure that your ECG data is sent to the TeltoCare platform. Although data is sent periodically, if there are any delays or missing data, utilizing the Force sync option in the TeltoHeart application enables you to trigger the data transfer process and ensure the availability of your ECG measurements in the TeltoCare platform.
|
|
How to power off TeltoHeart
1. In the main screen, swipe up, locate and tap  power icon power icon
|
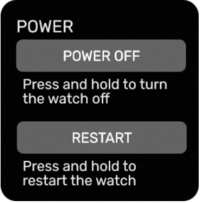
| 2. Press and hold Power off button to turn off the device
|
Technical specifications
BODY
|
| Dimensions (Width x Length x Height):
|
40.5 (1.6") x 47 (1.9") x 14.7 (0.6") mm
|
| Weight:
|
52 g
|
| Main CPU:
|
nRF5340
2x ARM Cortex M33 cores for application and network
|
| Platform (OS):
|
Zephyr RTOS
|
DISPLAY
|
| Brightness:
|
250 NITS
|
| Resolution:
|
240 x 240 px
|
| Type:
|
LCD TFT
|
| Size:
|
1.3“
|
| Cover lens:
|
Corning gorilla glass 3
|
| Surface hardness:
|
>8 H
|
| Display area:
|
547.56 sq mm
|
TELTOHEART MEMORY
|
| Capacity:
|
128 Mb
|
CONNECTIVITY
|
| Bluetooth version:
|
5.3
|
| Remote access:
|
Cloud
|
|
|
| Operating frequency:
|
2402 MHz – 2480 MHz
|
| Max. output power:
|
3 dBm
|
FEATURES
|
- ECG sensors for electrocardiogram
- PPG sensors for AFib detection
- Cloud-based firmware updates, configuration app (Bluetooth)
- Water resistant 1 m (for 30 minutes)
- Protection level against ingress of solid objects: IP 67
|
POWER SUPPLY
|
| Build-in rechargeable Li-Po battery (not replaceable by the user):
|
|
| Charging voltage:
|
5 V ⎓
|
| Operating voltage:
|
- Internal Battery 3.8 V ⎓
- External power supply 5 V ⎓
|
| Max. Input current (A):
|
0.5 A
|
SENSORS AND COMPONENTS
|
|
|
BUTTONS
|
| Side button (Turn on, Restart, Back)
|
STRAPS
|
| The wristband with an electrode is made of silicone rubber with an integrated stainless-steel electrode
|
| Strap material:
|
Silicone
|
STRAP SIZE
|
|
|
|
|
SUPPORTED PERIPHERALS
|
| ACCESSORIES:
|
|
Compatibility with other manufacturer accessories:
|
- Any CE marked wall charger with 5 V⎓/1A output and USB type-A connector
- Any CE certified USB-A to USB-C cable
- Any smartphone operating on Android OS version 10 or above with Google play store service.
- Any smartphone using iOS version 14 or above
|
COMPATIBILITY WITH MRI OR CT WAS NOT CHECKED AND USE OF DEVICE IN MRI OR CT ENVIRONMENT IS PROHIBITED
|
| Bluetooth compatibility:
|
Devices that use Bluetooth v5.0 or later in 2.4 GHz (2.402 – 2.480 GHz) band and SMP protocol are compatible with the device
|
CONDITIONS FOR USE
|
| Temperature range Operation:
Charging temperature range:
Storage temperature range:
- 1 Month: -20 to +35 ℃
- 6 Months: -20 to +30 ℃
|
Safety
Contraindications, Cautions, Warnings and Notes
|

|
Do NOT use the device on wounds as this may cause infection and pain. Threat the wounds first".
|

|
Patients with diseases, which manifest as skin photosensitivity should not use the device.
|
| CAUTIONS
|
| Handling and Care:
|

|
Do NOT use the device on wounds as this may cause infection and pain. Threat the wounds first".
|

|
Patients with diseases, which manifest as skin photosensitivity should not use the device.
|

|
Any modifications, performed by third parties, will void the warranty. Warranty claims may be excluded if you do not use and maintain the device as instructed or if you repair or modify the device yourself.
|

|
Warranty claims may be excluded if you do not use and maintain the device as instructed or if you repair or modify the device yourself.
|
| Connectivity and Data Management:
|

|
If data cannot be saved locally on your smartphone, please clear cache and try again.
|

|
The device requires a stable internet connection to function properly.
|
| Environmental and Safety Precautions:
|

|
Avoid using TeltoHeart in sandy environments. Do not submerge the device in salty water or any other electrically conductive liquid. Do not use the device in MRI or CT environment.
|

|
TeltoHeart is not intended to be used underwater.
|

|
Please store the docking station in an appropriate environment to avoid magnet degaussing.
|
| Electromagnetic Fields and Ultrasound:
|

|
Do not use the device in the presence of strong electromagnetic fields.
|

|
Do not use the device near ultrasound equipment.
|
| Cleaning and Maintenance:
|

|
Ensure that the magnetic connection of the docking station is clean of metallic bodies.
|
| Device Usage and Limitations:
|

|
TeltoHeart is not supposed to be worn in situations where it would be exposed to strong vibrations, for example while working with rammer compactors, vibrating plate compactor machines, hammer drills, etc.
|

|
Patients with diseases, which manifest as skin photosensitivity should not use the device.
|

|
Do not paint or put stickers on your device.
|

|
Do not cause excessive mechanical strain or shock to the device.
|

|
The device may be damaged, explode, or result in a fire if too much pressure is applied to it.
|

|
The device is not intended to be put in any bodily orifice.
|

|
The device is meant to be used by adults of age 22 or older.
|

|
Use on intact skin only.
|

|
Do not use excessive force while using the device. Excessive force may break or damage accessories.
|

|
Do not use the device in an environment where the temperature exceeds 45°C.
|

|
The platform is not suitable for people with paralyzed, deformed arms, or absence of both arms.
|

|
We strongly advise avoiding downloading or installing firmwares found in third party sites such as forums, etc. Installing unverified firmwares will result in warranty void.
|

|
Due to excess heat, the battery might be damaged. If the device starts heating, stop using the device immediately!
|

|
If the device starts heating, stop using it immediately to prevent damage to the battery and other components.
|

|
Do NOT short-circuit the charging contacts. Exposing the contacts with a metallic object, such a coin, a clip or a set of keys can cause accidental short-circuiting and damage battery and other components.
|

|
Do NOT use the device outside of operational temperature conditions, for example in a sauna.
|

|
Comply with all safety warnings and regulations regarding mobile device usage while operating the vehicle.
|

|
While driving, safely operating the vehicle is your first responsibility. Never use your mobile device while driving if it is prohibited by law. For your safety and the safety of others, use your common sense.
|
| Device operating temperature is -10 to 45 degrees Celsius.
|
| Please keep the device electrodes clean for best performance.
|
| Usage in rain or in very humid environment is not recommended.
|
| TeltoHeart mobile application and TeltoCare share the same login details.
|
Warranty
The warranty conditions and term of warranty shall apply in accordance with agreed conditions between you and your supplier.
It is important to carefully read and follow information for user (included but not limited quick start guide, technical specifications and user manual) and terms and conditions provided by the manufacturer. Failure to adhere to these guidelines may result in malfunctions or damage to the product, for which the manufacturer cannot be held responsible. It is the responsibility of the user to ensure that they fully understand and comply with the information provided by the manufacturer and terms and conditions before using the product. By doing so, users can help ensure the safe and effective use of the product and avoid any potential damage or liability.
Equipment symbols
| Symbol
|
Description
|

|
Manufacturer
|

|
Consult instructions for use
|
|
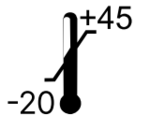
Temperature limit
|

|
Protection against ingress of water or particulate matter
|
Additional information
All newest certificates may be found in our Wiki page1.
1 Certifications and Approvals
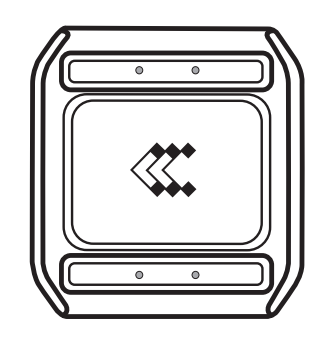
 Insert a USB Type-C cable into the charging dock.
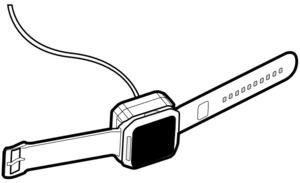
 To recharge, place TeltoHeart on the charging dock, which is included in the packaging.