From Teltonika Telemedic Wiki
|
|
| Line 185: |
Line 185: |
| |style="text-align: center;" colspan="3"| [[Image:TC-26.png|1000px|border|link=]] | | |style="text-align: center;" colspan="3"| [[Image:TC-26.png|1000px|border|link=]] |
| |- | | |- |
| style="width: 800px;height: 60px; text-align: left; border: 1px solid #0054A6; border-bottom: 1px solid #0054A6; border-left: 1px solid #0054A6;border-top: 1px solid #0054A6;border-right: 1px solid #0054A6;background: #E7F1FE; color: black; text-align: left; padding: 10px;"
| |
| | style="width: 40px;height: 20px;padding: 10px;" | [[File:Note_icon.png|30 px|link=]] | | | style="width: 40px;height: 20px;padding: 10px;" | [[File:Note_icon.png|30 px|link=]] |
| || '''Please note:'''<br>If there has been a mistake or you wish to restore your account, please contact your provider or Teltonika Telemedic and within 14 days support can restore account if required. After 14 days patient will be deleted from database permanently. | | || '''Please note:'''<br>If there has been a mistake or you wish to restore your account, please contact your provider or Teltonika Telemedic and within 14 days support can restore account if required. After 14 days patient will be deleted from database permanently. |
|
| |
|
| |} | | |} |
Revision as of 12:59, 15 February 2024
TeltoCare login
| TeltoCare login
|
1. Open a web browser and go to the URL: https://teltocare.com
|
2. Enter your password in the login field.
|
| 3. If it is your first time using the app, sign-in by entering e-mail address and the password, which has been sent to your e-mail.
|

|
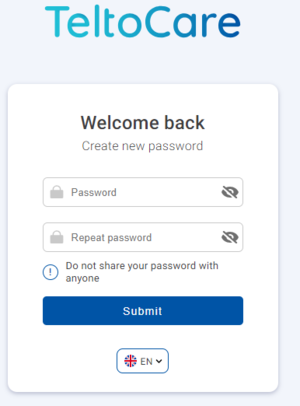
| 4. TeltoCare will prompt you to change temporary password to your preferred one.
|
|
| 5. When preferred password is set up, you will be able to login to TeltoCare distributor’s environment.
|
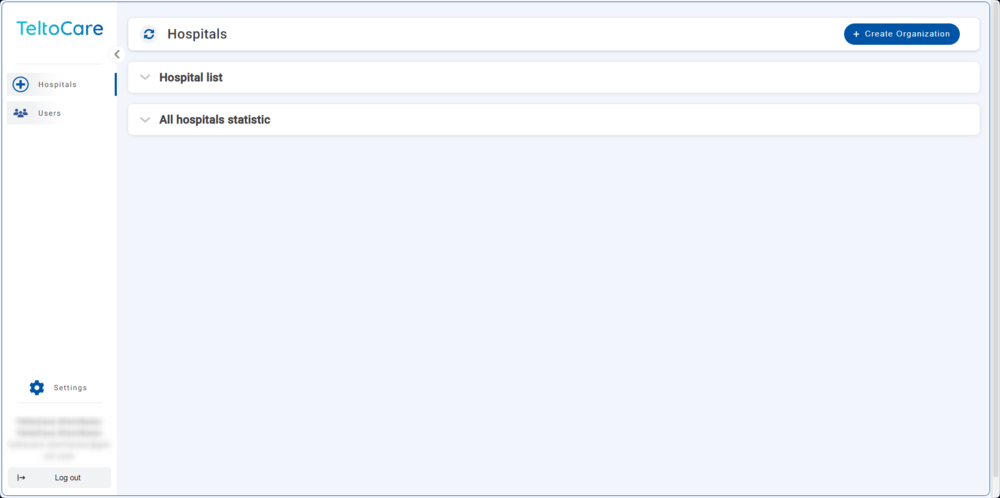
Distributor's environment
| Distributor's environment
|
| Within the TeltoCare platform, distributors have the ability to create accounts for hospitals. As part of their environment, distributors facilitate the onboarding process for healthcare professionals who will be providing medical services through the platform. This involves creating accounts for hospitals, granting them access to the necessary features and functionalities of the TeltoCare platform.
|
|
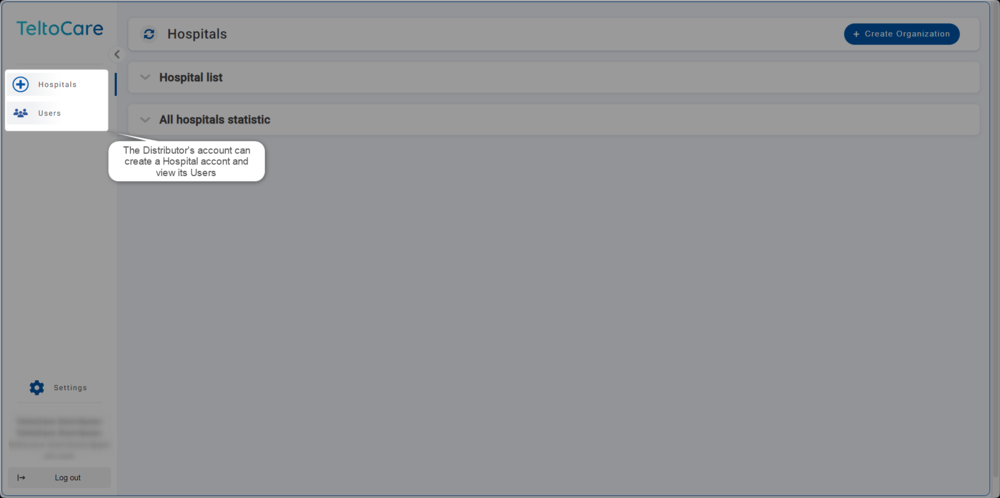
Distributor - Navigation bar
Navigation bar
|
|
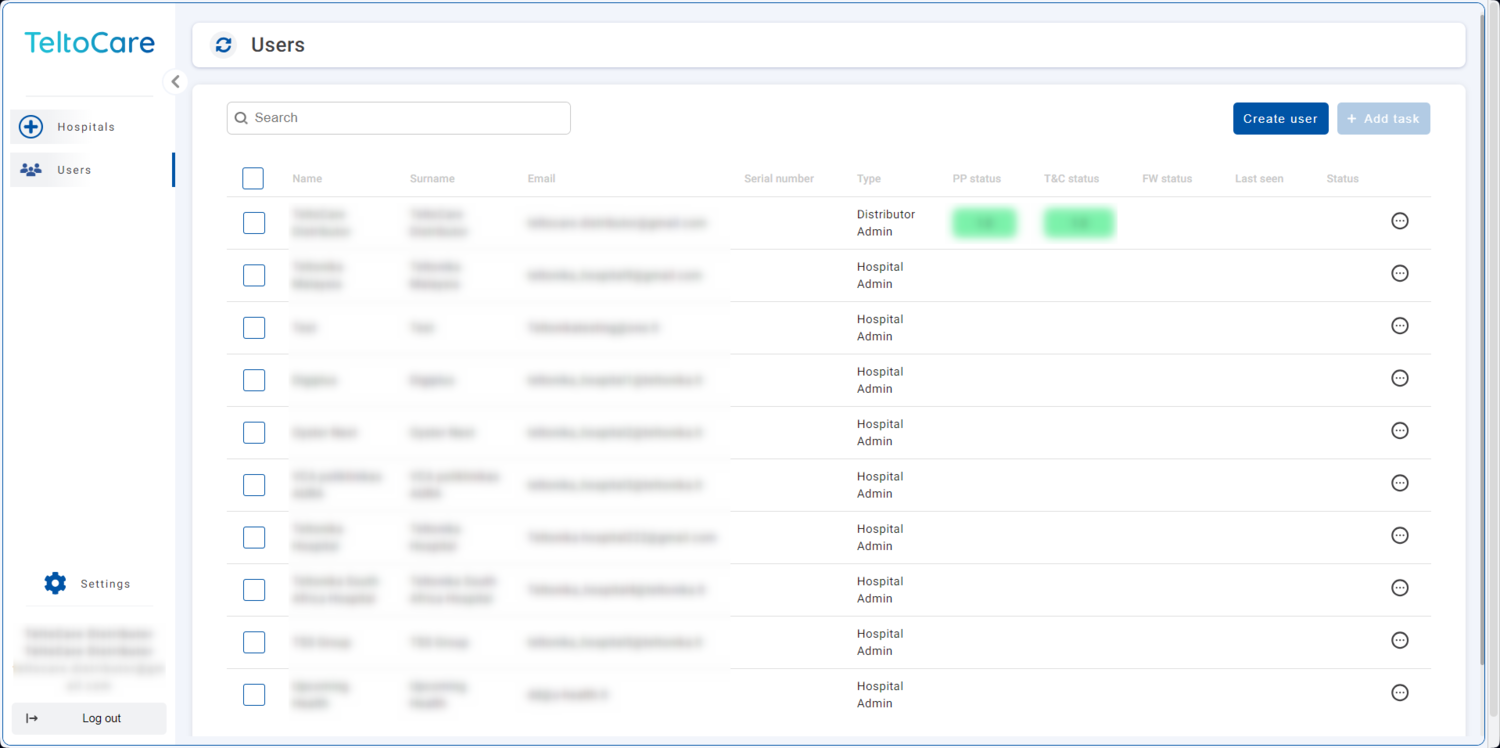
Distributor - User list
| User list
|
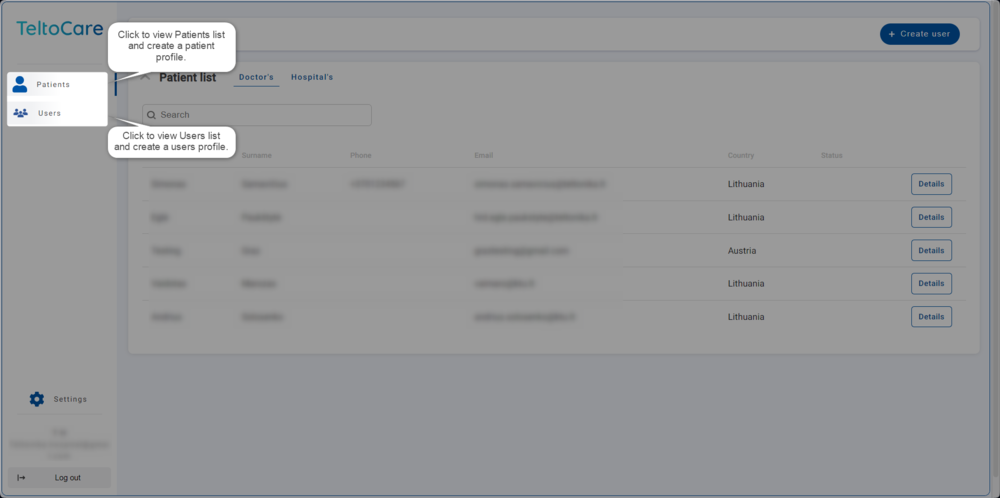
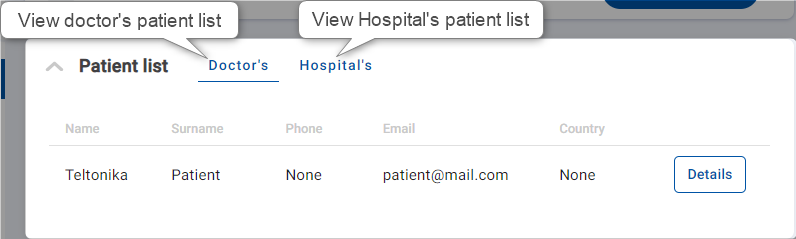
| The User list provides the ability to view contact details, including their names, surnames, phone numbers, emails, and affiliated hospital.
|
|
| Click ... and select Details button to view hospital’s patient list.
|

|
Distributor - Create a Hospital environment
| Create a Hospital environment
|
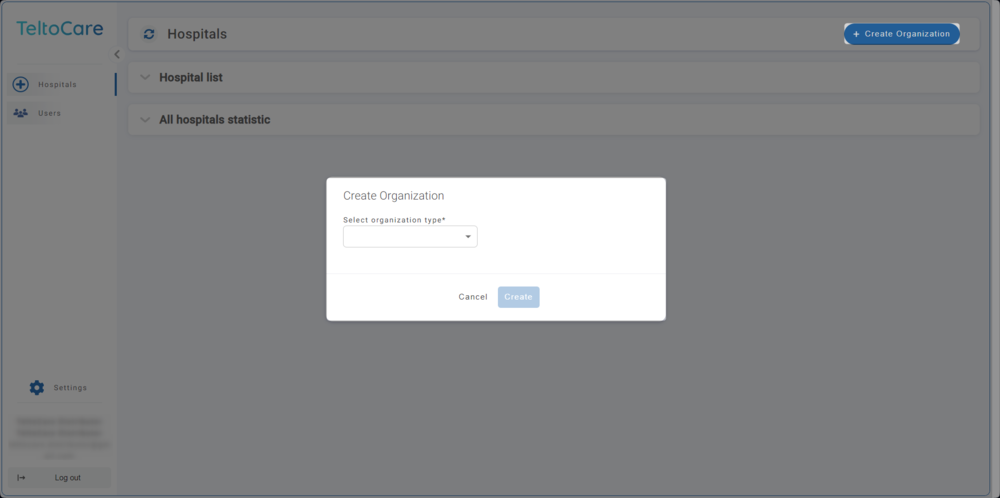
Click on “Create Organization” button on top right side to create a Hospital account.
|
|
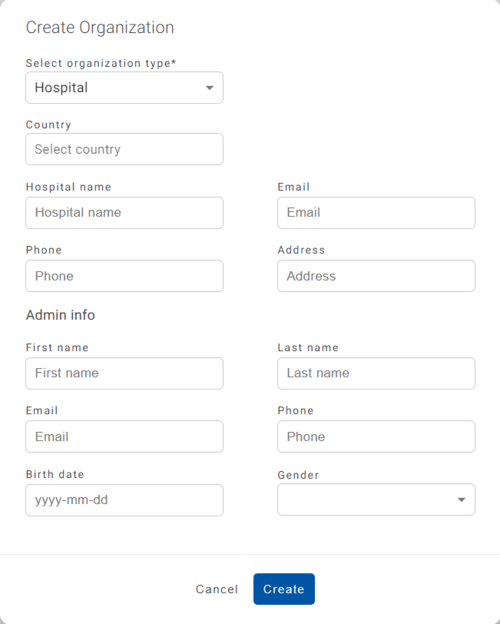
| Enter the required information and, when done, click "Create" to establish a Hospital account. Once created, an invitation email to TeltoCare will be sent.
|
|
Hospital environment
| Hospital environment
|
| Hospital environment has ability to view a full list of Hospital’s doctors and patients, create new doctor accounts, view assigned patients and their medical data such as events, electrocardiogram, atrial fibrillation events and heart rate.
|

|
Hospital - Navigation bar
Navigation bar
|
|
Hospital - Create user
Create user
|
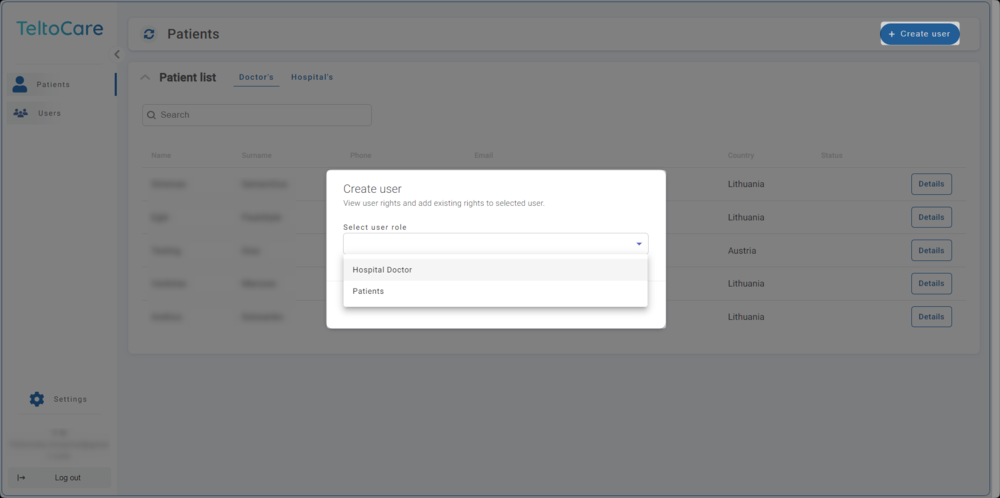
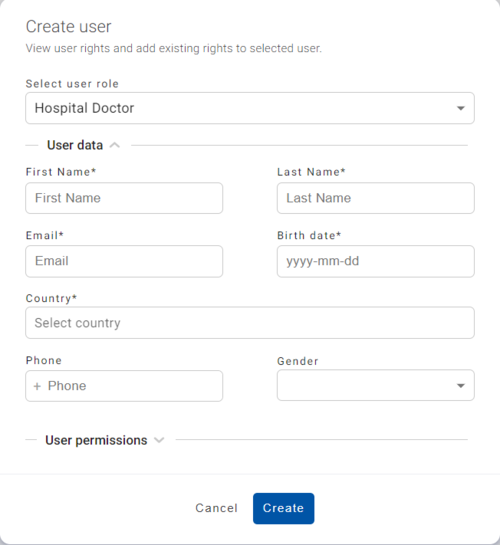
Click the Create button to set up a new patient or doctor account.
|
|
Enter the required information and, when done, click Create to establish a Patient or Doctor account. Once created, an invitation email to the provided email will be sent.
|
|
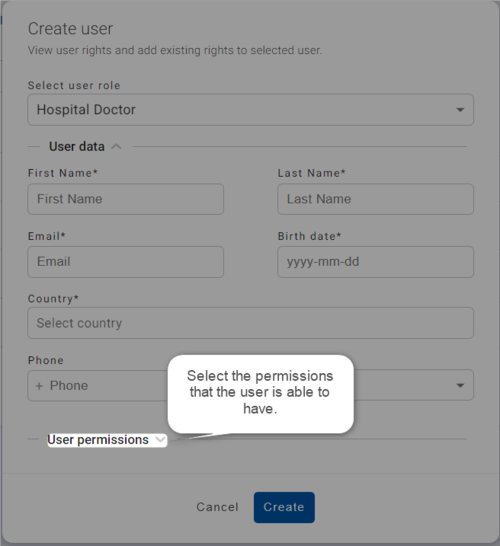
| Select the permissions that the user is able to have.
|
|
Doctor environment
| Doctor environment
|
| Doctors within the TeltoCare platform have access to specific patient information and data for medical purposes. They are authorized to view patients' medical records, personal information, and ECG measurement data. This access allows doctors to provide comprehensive and informed medical consultations, make accurate diagnoses, and offer appropriate treatment recommendations.
|
|
Doctor - Navigation bar
Navigation bar
|
|
|
Doctor - Create user
Create user
|
Click the Create button to set up a new patient or doctor account.
|
|
|
Enter the required information and, when done, click Create to establish a Patient or Doctor account. Once created, an invitation email to the provided email will be sent.
|
|
| Select the permissions that the user is able to have.
|
|
|
Doctor - Patient list
Patient list
|
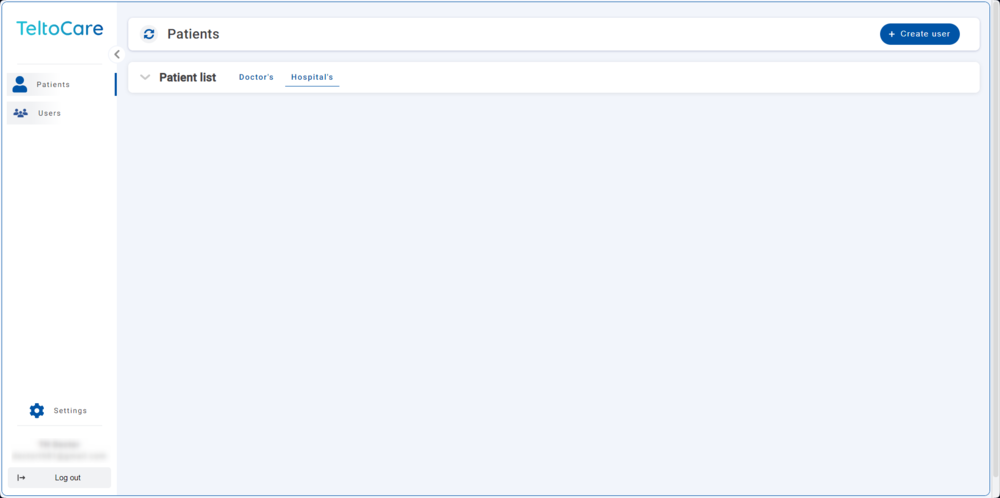
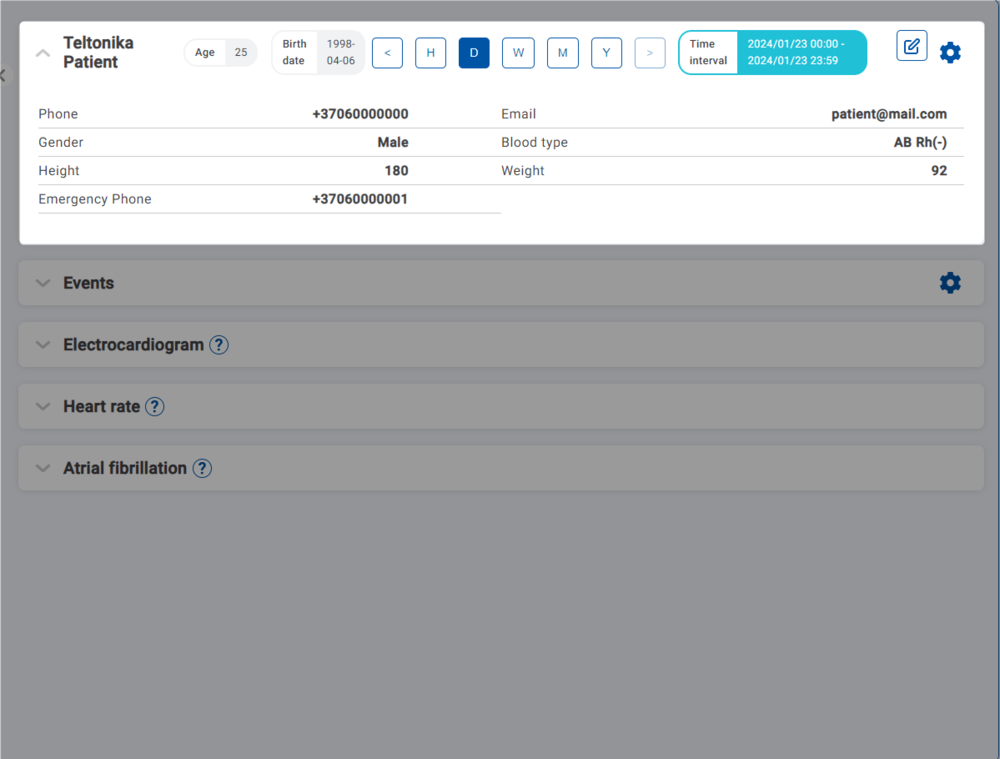
The patient list provides the ability to view patient’s contact details, including their names, surnames, phone numbers, emails, and country.
|
|
Click on the first tab to view patient’s contact details.
|
|
Doctor - Time interval
Time interval
|
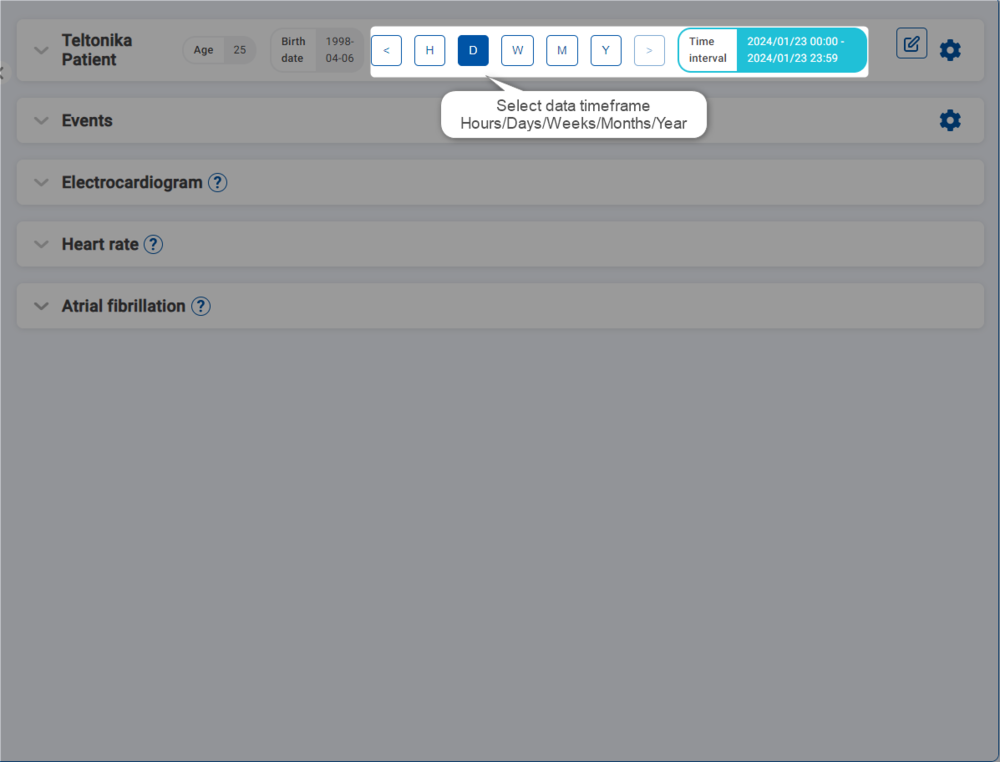
Choose a time frame to view data. You can select by hour, day, week, month, or year or press on "<" or ">" icons.
|
|
You can also manually select the time interval and choose a date.
|

|
Doctor - Edit patient's information
Edit patient's information
|
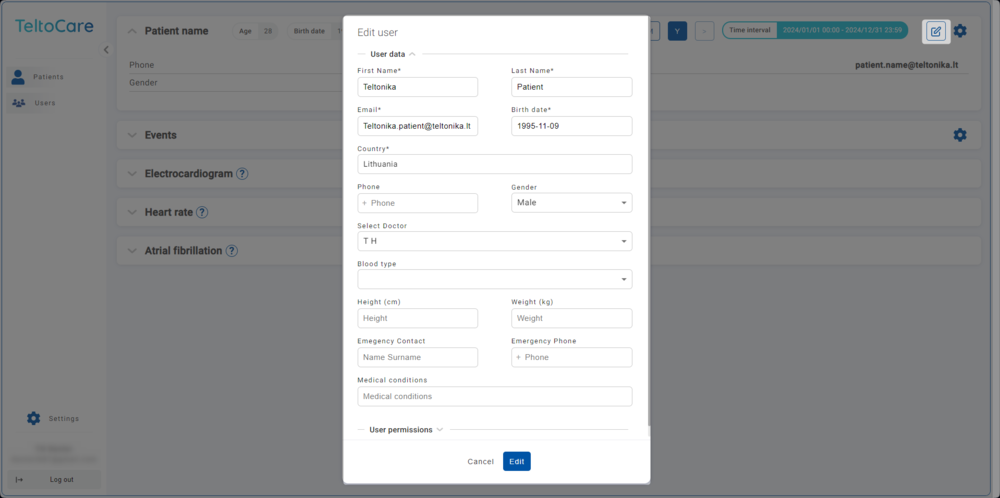
Tap on the pencil icon to edit patient’s information. Click Edit to confirm the changes.
|
|
Doctor - Delete a patient
Delete a patient
|
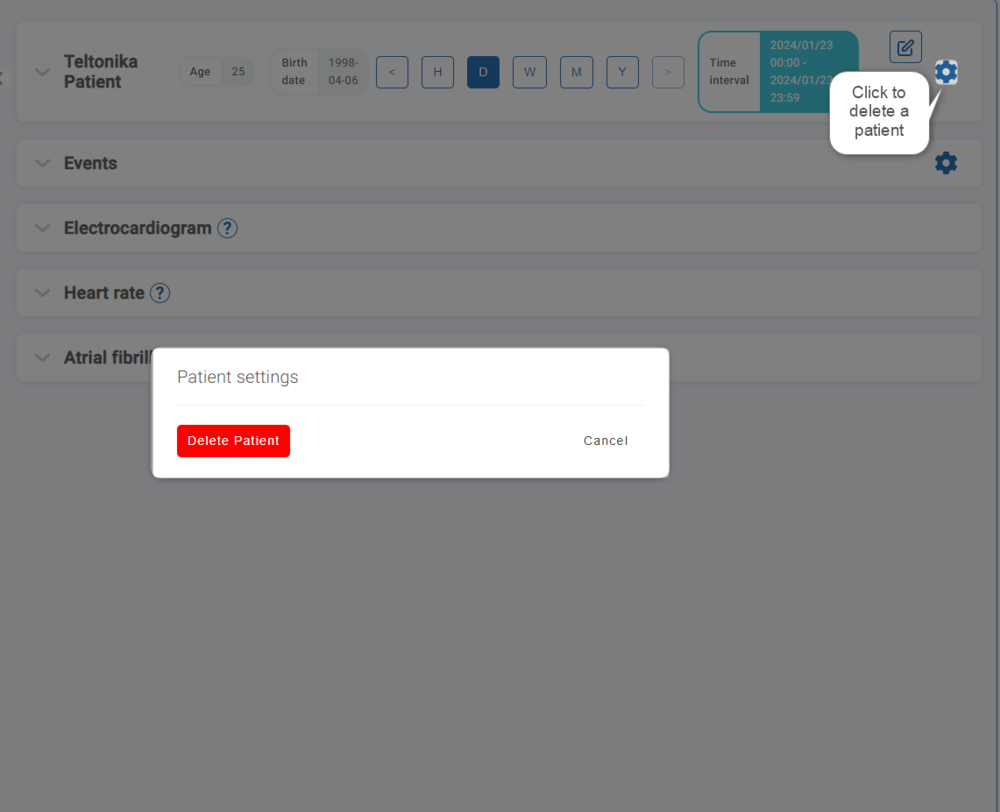
If you wish to delete a patient’s account, click on the gear icon and click Delete Patient button.
|
|

|
Please note:
If there has been a mistake or you wish to restore your account, please contact your provider or Teltonika Telemedic and within 14 days support can restore account if required. After 14 days patient will be deleted from database permanently.
|